Tutorial for - Installing, configuring and getting started with
- Java,
- Apache Tomcat
- My SQL
- Eclipse
Java Technology
Java technology is both a programming language and a platform.
The Java Programming Language
The Java programming language is a high-level language that can be characterized by all of the following buzzwords:
| |
In the Java programming language, all source code is first written in plain text files ending with the .java extension. Those source files are then compiled into .class files by the javac compiler. A .class file does not contain code that is native to your processor; it instead contains bytecodes — the machine language of the Java Virtual Machine1 (Java VM). The java launcher tool then runs your application with an instance of the Java Virtual Machine.

An overview of the software development process.
Because the Java VM is available on many different operating systems, the same .class
files are capable of running on Microsoft Windows, the Solaris™
Operating System (Solaris OS), Linux, or Mac OS. Some virtual machines,
such as the Java HotSpot virtual machine,
perform additional steps at runtime to give your application a
performance boost. This include various tasks such as finding
performance bottlenecks and recompiling (to native code) frequently used
sections of code.

Through the Java VM, the same application is capable of running on multiple platforms.
The Java Platform
A platform is the hardware or software environment in which a program runs. We've already mentioned some of the most popular platforms like Microsoft Windows, Linux, Solaris OS, and Mac OS. Most platforms can be described as a combination of the operating system and underlying hardware. The Java platform differs from most other platforms in that it's a software-only platform that runs on top of other hardware-based platforms.The Java platform has two components:
- The Java Virtual Machine
- The Java Application Programming Interface (API)
The API is a large collection of ready-made software components that provide many useful capabilities. It is grouped into libraries of related classes and interfaces; these libraries are known as packages. The next section, What Can Java Technology Do? highlights some of the functionality provided by the API.

The API and Java Virtual Machine insulate the program from the underlying hardware.
As
a platform-independent environment, the Java platform can be a bit
slower than native code. However, advances in compiler and virtual
machine technologies are bringing performance close to that of native
code without threatening portability.What Can Java Technology Do?
The
general-purpose, high-level Java programming language is a powerful
software platform. Every full implementation of the Java platform gives
you the following features:
- Development Tools: The development tools provide everything you'll need for compiling, running, monitoring, debugging, and documenting your applications. As a new developer, the main tools you'll be using are the javac compiler, the java launcher, and the javadoc documentation tool.
- Application Programming Interface (API): The API provides the core functionality of the Java programming language. It offers a wide array of useful classes ready for use in your own applications. It spans everything from basic objects, to networking and security, to XML generation and database access, and more. The core API is very large; to get an overview of what it contains, consult the Java SE Development Kit 6 (JDK™ 6) documentation.
- Deployment Technologies: The JDK software provides standard mechanisms such as the Java Web Start software and Java Plug-In software for deploying your applications to end users.
- User Interface Toolkits: The Swing and Java 2D toolkits make it possible to create sophisticated Graphical User Interfaces (GUIs).
- Integration Libraries: Integration libraries such as the Java IDL API, JDBC™ API, Java Naming and Directory Interface™ (JNDI) API, Java RMI, and Java Remote Method Invocation over Internet Inter-ORB Protocol Technology (Java RMI-IIOP Technology) enable database access and manipulation of remote objects.
Downloading and Installing J2SE Software on Windows Platform
To download J2SE for development visit http://www.java.sun.com/j2se and download J2SE on your machine. In this tutorial we have used jdk-1_5_0_06-windows-i586.exe.The java 2Platform or (JDK) can be downloaded from the sun. Formerly Known as the java Development kit ,or JDK, Downloading java is really about downloading the java 2 plat form that comes in three editions , J2ME, J2SE and J2EE , if you are learning java, then, you should start by downloading J2EE.
Once you have downloaded the j2se on your system, you are ready to install . In the following section we will learn how to install jdk development environment on your machine. here are the step to install JDK on your windows machine.
Step 1
Double click the JDK down loaded file, the executable extracts the required Contents to the temporary directory and then License agreement screen appears. On the license agreement page read and accept the license and the click the next button .

Step 2
The custom setup screen appears as follows.

Step 3
Click on the change button to change the installation directory to "c:\jdk1.5.0_06" as shown in the following screen.

and click on the "OK" button. After clicking on the "OK" button installation begins:

Step 4
In the next window installer asks for the installing the runtime as shown in the following screen:

Step 5
Click on next button install the J2SE runtime on your machine. Next screen shows the browser selection:
Click on the "Next" button.

Step 6
Once the installation is finished it shows you the final screen indications the success. Now you have successfully installed J2SE on your machine. Installer shows the following final confirmation window as shown below:
Click on the "Finish" button to exit from the installer.

Configuring the installation on windows machine:
In this Section we will add some settings to the windows environment so that the java compiler and runtime becomes available for compiling and running the java application.

Go to the control panel and double click on "System Properties" and to the advance tab.
and add "c:\jdk1.5.0_06" to path variable: (depends on your installation location)

and click on ok button. To save the setting click on "OK" button.
This will make the java environment available for development. Open the dos prompt and type javac on the console, it should show the following output:
| Microsoft Windows 2000 [Version 5.00.2195] (C) Copyright 1985-2000 Microsoft Corp. C:\Documents and Settings\Administrator>java Usage: java [-options] class [args...] (to execute a class) or java [-options] -jar jarfile [args...] (to execute a jar file) where options include: -client to select the "client" VM -server to select the "server" VM -hotspot is a synonym for the "client" VM [deprecated] The default VM is client. -cp <class search path of directories and zip/jar files> -classpath <class search path of directories and zip/jar files> A ; separated list of directories, JAR archives, and ZIP archives to search for class files. -D<name>=<value> set a system property -verbose[:class|gc|jni] enable verbose output -version print product version and exit -version:<value> require the specified version to run -showversion print product version and continue -jre-restrict-search | -jre-no-restrict-search include/exclude user private JREs in the version search -? -help print this help message -X print help on non-standard options -ea[:<packagename>...|:<classname>] -enableassertions[:<packagename>...|:<classname>] enable assertions -da[:<packagename>...|:<classname>] -disableassertions[:<packagename>...|:<classname>] disable assertions -esa | -enablesystemassertions enable system assertions -dsa | -disablesystemassertions disable system assertions -agentlib:<libname>[=<options>] load native agent library <libname>, e.g. -agentlib:hprof see also, -agentlib:jdwp=help and -agentlib:hprof=help -agentpath:<pathname>[=<options>] load native agent library by full pathname -javaagent:<jarpath>[=<options>] load Java programming language agent, see java.lang.instrument C:\Documents and Settings\Administrator> |
Now your development environment is ready for development.
Reference :- http://www.roseindia.net/java/beginners/installing_java.shtml
Running a java program in Command line
We have java program in C:\ HelloWorld.java

| HelloWorld.java |
| class HelloWorld { public static void main(String[] args) { System.out.println("Hello World!"); } } |
Compiling the program
javac HelloWorld.java


Running the program
java HelloWorld

Installing, Configuring, & Running Tomcat 6.0 Servlet Container on Microsoft Windows, and Developing & Running your first JSP Page
What is JSP?
JSP stands for 'Java Server Pages'. These are pages which are used to serve dynamic content to the user using logic and data (XML, Database etc) on the server side. JSP is a part of J2SE (Java 2 Standard Edition) and along with Java Servlets and Java Beans is used to develop efficient, scalable and secure web applications in quick time.
Why bother with JSP when ASP is already here?
Nice question, first of all ASP is not the only solution out there which supports rapid web application development, there are others like PHP, Perl, ColdFusion etc. JSP is different from all of them because :
- JSP uses Java. Java is by far one of the most popular programming languages on the web. Its simpler syntax and 'write once run anywhere' capability makes it THE server side programming language of choice. So JSP pages and Java applications that you create will run on almost all major operating systems e.g. Windows, UNIX, Mac etc. You don't need to create separate apps for separate platforms.
- JSP is part of J2EE. J2EE (Java 2 Enterprise Edition) is one of the most popular models used to develop Enterprise level applications. J2EE is supported by software giants like Sun Microsystems, BEA, Oracle, IBM etc. So once you learn to program JSP, you can extend your skills to learn other Java technologies to become what is called, an Enterprise Software Developer.
- Networking is built into Java. Java's inherent support for networking makes it an ideal langauge for the internet.
Tomcat 6.0 is an open source and free Servlet Container and JSP Engine. It is developed by Apache Software Foundation and is available for download at http://tomcat.apache.org, or more specifically at http://tomcat.apache.org/download-60.cgi. Choose the latest Tomcat 6.0 version. Currently Tomcat 6.0.14 is the latest version. Once you have downloaded Tomcat 6.0, proceed to the next step.
You'll need to have JDK 1.6 (or simply 'JDK 6', as it is called on Sun's download page) installed on your system in order for Tomcat 6.0 to work properly. If you don't already have it, you can get it from java.sun.com.
Installing Tomcat 6.0
Unzip the file to a suitable folder. In Windows, you can unzip it to C:\ which will create a directory like C:\apache-tomcat-6.0.14 containing Tomcat files.
Or you can download the .exe file http://tomcat.apache.org/download-60.cgi
apache-tomcat-6.0.32.exe

Install the .exe file


Port configuration, password and user name
 Selecting installed JRE
 Installation directory
Selecting installed JRE Installation directory
Now you'll have to create two environment variables, CATALINA_HOME and JAVA_HOME. Most probably you'll have JAVA_HOME
already created if you have installed Java Development Kit on your
system. If not then you should create it. The values of these variables
will be something like :
- CATALINA_HOME : C:\Program Files\Apache Software Foundation\Tomcat 6.0 (if you have just extracted the tomcat directory in C:\ you can give CATALINA_HOME : C:\apache-tomcat-6.0.14)
- JAVA_HOME : C:\Program Files\Java\jdk1.6.0_03
go to Start -> Settings -> Control Panel -> System -> Advanced -> Environment Variables -> System variables -> New.
Enter the name and value for CATALINA_HOME and also for JAVA_HOME if not already there.

Under Windows 95/98, you can set these variables by editing C:\autoexec.bat file. Just add the following lines and reboot your system :
- SET CATALINA_HOME= C:\Program Files\Apache Software Foundation\Tomcat 6.0
SET JAVA_HOME=C:\Program Files\Java\jdk1.6.0_03
Running Tomcat 6.0
Ok now, lets start Tomcat by running the C:\apache-tomcat-6.0.14\bin\startup.bat batch file(if you have just extracted the tomcat directory in C:\). Tomcat server will start and print some status messasge. Now point your browser to http://localhost:8080 and you should see the default Tomcat home page.

To shutdown the server run
C:\apache-tomcat-6.0.14\bin\shutdown.bat batch file.
Starting Tomcat –
If you have installed through .exe file you can start tom cat
go to Start -> All Programs -> Apache Tomcat 6.0 -> Monitor Tomcat


Working with Tom cat server
Go to C:\Program Files\Apache Software Foundation\Tomcat 6.0\webapps folder and create a new directory with the name of "star". You can give it any name you want but for this example we'll stick with "star".
Now create a new file and save it as 'index.jsp' in the "star" directory created above. Copy the following text into 'index.jsp' file and save it :
<html>
<head>
<style>p { font-family:tahoma; font-size:14pt; }</style>
</head>
<body>
<%
String name = "Umeshnarayanan";
%>
<p>Hello <%= name %>!</p>
</body>
</html>


Out put in browser
Installing MySQL
Online Reference Manual: dev.mysql.com/doc/mysql/en/index.html
MySQL will be installed as a service which will start up with Windows. It is recommended you accept most of the defaults although I did check in the "Include Bin Directory in Windows Path" checkbox (which allows Windows to find executables from the command line if you choose to run it that way occasionally) and you should add a password when given the opportunity. You should configure your firewall to accept the port(usually port 3306).
Grab your favorite MySQL manual and create a database and some tables from the command line. If you're not in love with command line programming give the MySQL Administrator below a try.
Java - MySQL Connector
Download: dev.mysql.com/downloads/connector/j/5.1.html
The Java-MySQL Connector allows standard Java JDBC commands to access the database. As of December, 2010, the current connector is 5.1.14.
Download and unzip the file linked above. Copy the mysql-connector-java-5.1.14-bin.jar to the following folder in the Java home directory: C:Program Files\Java\jdk1.6.0_23\jre\lib\ext. Then add the jar to the “Classpath” variable in the System environmental variables (Control Panel --> System --> Advanced --> Environmental Variables). Your addition should read something similar to: C:\Program Files\Java\jdk1.6.0_23\jre\lib\ext\mysql-connector-java-5.1.6-bin.jar
Reference:- http://www.sipages.com/mysqlpage.shtml
Installing MySQL
you can download the software from the MySQL website.)
Be sure to download the Windows (x86) version (way at the bottom of the
page), which includes a Windows Installer. Save the file on your
Windows Desktop.
It's time to install SQL Server.
The installation file comes as a .zip file. Double click the file. Your
unzipping software should open the file and show you a list of files
inside the archive. There should be only 1, "Setup.exe". There is no
need to extract the file from the archive, just go ahead and double
click the "Setup.exe" file. After you've done that, you should see a
window that looks like this: Click "Next>".MySQL Install Window

3 On the next window, click the radio button "Custom", and then click "Next>". Since we have installed Apache in C:\Server, we are going to install MySQL in the same directory.
4 On the next window, highlight "MySQL Server", and then click the "change" button.
5On the next window, in the text box "Folder name:", change the directory to "C:\Server\MySQL\". Make sure you include the ending backslash. Then click "OK".
6 On the next window, click "Next>".
7Now MySQL is ready to install. You should see a window that looks like this:
MySQL Ready to Install

8 Click "Install".
9 Once the installation is complete, you will be presented with a "MySQL Sign-Up" window. Click the radio button "Skip Sign-Up", and then click "Next>". You can sign-up for MySQL.com later if you like.
10 If the installation was successful, you should see a window that looks like this:
 MySQL success
11 MySQL was successfully installed. Now we want to configure it. Leave the check box "Configure the MySQL Server Now" checked, and click "Next>". After you do that, you should see a window that looks like this:
 MySQL Configure
12 Click "Next>".
13 On the next window, click the radio button "Standard Configuration", and then click "Next>".
14 On the next window make sure "Install As Windows Service" and "Launch the MySQL Server Automatically" check boxes are checked. Click "Next>".
15 On the next window you need to create a root password. Type in what you want your root password be and make sure "Enable root access from remote machines" is checked. Make sure you choose a difficult to guess password and write it down so you don't forget it. Click "Next>".
16 On the next window, click "Execute". This will start the MySQL server. After MySQL has done its thing, click "Finish".
17 Now we need to make sure MySQL was in fact installed sucessfully. On the Windows task bar, click "Start">"All Programs">"MySQL">"MySQL Server 4.x">"MySQL Command line client".
18This will open a command window that is asking you for a password. Enter the password that you chose as your root password. Hit enter and you should see a window that looks like this:
Working with MySQL
MySQL Command Line Client

Some important SQL commands
mysql> SELECT VERSION(), CURRENT_DATE; - version number and the current date.mysql> SHOW DATABASES; statement to find out what databases currently exist on the server:
mysql> USE test - accessing database
mysql> CREATE DATABASE menagerie; - Creating a Database
mysql>
CREATE TABLE pet (name VARCHAR(20), owner VARCHAR(20),
-> species VARCHAR(20), sex CHAR(1), birth DATE, death DATE); - Creating a Table
mysql> SHOW TABLES; - displaying table
mysql> DESCRIBE pet; - To verify that your table was created the way you expected, use a DESCRIBE statement:
mysql> INSERT INTO pet
-> VALUES ('Puffball','Diane','hamster','f','1999-03-30',NULL); - inserting values to table
mysql> SELECT * FROM pet; - The SELECT statement is used to pull information from a table. The general form of the statement is:
mysql> DELETE FROM pet; - delting table
mysql> UPDATE pet SET birth = '1989-08-31' WHERE name = 'Bowser'; - updating data
MySQL GUI
With so many free MySQL administration tools available, many developers favor these free Graphical User Interfaces over the command line. The most popular options include:- phpMyAdmin - A popular web interface that is included with almost every type of Shared, Virtual or Dedicated hosting solution.
- MySQL Administrator - A powerful tool developed by the folks at MySQL.com
- Navicat - A purchasable MySQL admin tool for Windows, Mac and Linux.
MySQL phpMyAdmin
As previously mentioned, the very popular phpMyAdmin tool should come with your web hosting plan.http://www.phpmyadmin.net/home_page/
MySQL Database Connectivity with JSP (Windows)
A
tutorial on how to get started with JavaServer pages using Sun's Tomcat
web server (a Jakarta variant) and connecting to a MySQL database to
retrieve data. Provided as a jumpstart for practicing with real-world
applications.
Download the MySQL connector –
- MySQL Connector/J - version 2 used for this tutorial - http://www.mysql.com/downloads/api-jdbc.html
- Copy the MySQL Connector JAR file to the C:\Tomcat\common\lib and C:\Program Files\Java\jdk1.6.0_17\lib folder (ie, mysql-connector-java-2.0.14.jar).

Write Your Code!
You can now start writing your JSP scripts. Save it in a file with a JSP extension and place it in the ROOT folder. I have provided a simple JSP script that demonstrates how to connect to a list data from a MySQL database.
<%@ page import="java.sql.*" %>
<%
String connectionURL = "jdbc:mysql://localhost:3306/image_application "; // data base name
Connection connection = null;
Statement statement = null;
ResultSet rs = null;
%>
<html><body>
<%
Class.forName("com.mysql.jdbc.Driver").newInstance();
connection = DriverManager.getConnection(connectionURL,
"",
"");
statement = connection.createStatement();
rs = statement.executeQuery("SELECT * FROM
images"); // table name
while (rs.next()) {
out.println(rs.getString("image_name ")+"<br>");
}
rs.close();
%>
</body></html>

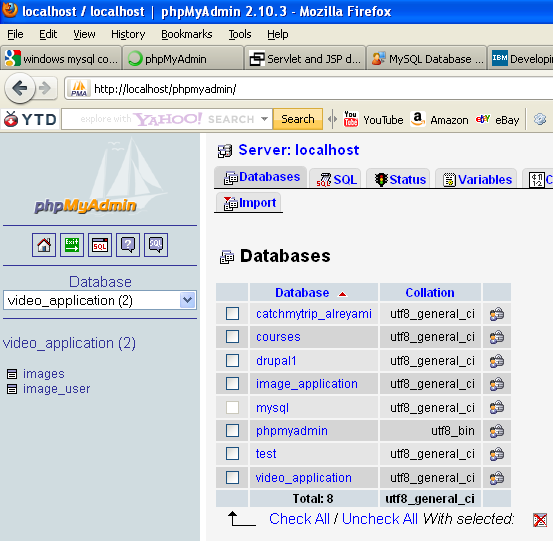
Table view in php MyAdmin
Fetched details
In browser
 (it display the image name stored in the database )
Install and run Eclipse into your computer
Important prerequisite: you must first install the Java Development Kit. Eclipse requires a JRE or JDK to start because Eclipse is itself a - sophisticated - Java application with millions of lines of Java code. JDK and Eclipse are both free.
1. Click on Eclipse IDE 3.5 for Java developers on Windows to download the Eclipse application. The following file download dialog appears. Select 'Open'.

2. Wait a few minutes while the eclipse application is downloaded to your computer. Go and enjoy a snack or a coffee and when you return you should have the following window on your screen. Note if you use Winzip, instructions below will not directly apply but will remain very similar.

3. Click on 'Extract all files' in the window above. The Extraction Wizard shown below comes up. Click 'Next'.

4. Type in c:\ to install Eclipse under your C: drive. Click Next.

5. Wizard has completed the installation of the program Eclipse a few moments later. Click Finish.

6. To start Eclipse, find the Eclipse folder under your C drive in the Windows Explorer. Double click on the eclipse folder to open it.

7. Inside the eclipse folder, find the program named eclipse.exe. It has a purple icon. Double click on eclipse.exe to start Eclipse.

8. During the startup, Eclipse asks you to specify the location of the workspace - where we will store our Java programs. Use C:\workspace as indicated in the screen below. It is suggested you check the option 'Use this as the default and do not ask again'.

9. Eclipse shows up on the screen. Create a new Java Project from the menu File, New, Java Project - as indicated below.

10. Name the new project science. Select 'Use project folder as root for sources and class files' as shown below. Click Finish.

11. Close the welcome page by clicking on the red button shown below.

2. Download the programs from this website into your computer
1. Click on the link Program - PseudoRandom.java to download this Java file into the folder C:\workspace\scienceYou can repeat this step for every program you want to download. The list of Java programs is shown at the main site.
3.Execute the Java programs with Eclipse
1. Click on the science folder as indicated by the arrow marked with an A below. Press the F5 key on your keyboard to refresh Eclipse. The program PseudoRandom.java appears. You can double click on this file - arrow marked with a B. The program is opened in an editor which you can use to modify this program when going through the exercises - area marked with a C.2. Select PseudoRandom.java - arrow D - and click the white arrow in a green circle to start the Java program PseudoRandom - arrow E.

Congratulations! You have started a Java program with the Eclipse application. You can edit the program - area C - save it with the menu File / Save, and start the modified program again - arrow E.

Installing java in UBUNTU (Linux)
command to find out current jdk version in apt-get

apt-cache search jdk


check if Java was installed properly in your system

sudo java -version

java version "1.6.0_18"
OpenJDK Runtime Environment (IcedTea6 1.8) (6b18-1.8-0ubuntu2)
OpenJDK Client VM (build 14.0-b16, mixed mode, sharing)


Install java JDK and JRE with apt-get install

( Install Eclipse IDE on Ubuntu 11.10 (Oneiric Ocelot) )


sudo apt-get install eclipse


you are a java developer then install JDT (Java Development Tools) using the command -

sudo apt-get install eclipse-jdt


C/C++ programming, install CDT plugin,

sudo apt-get install eclipse-cdt


Find a correct tomcat package to install

sudo apt-cache search tomcat


start/stop/restart Tomcat with following command

/etc/init.d/tomcat5.5 start
/etc/init.d/tomcat5.5 stop
/etc/init.d/tomcat5.5 restart


apt-get help to create a share folder in /usr/share also, please access

cd /usr/share/tomcat5.5


sudo apt-get install sun-java6-jdk sun-java6-jre


After installation done, jdk and jre will install at /usr/lib/jvm/java-6-sun-1.6.0.06
Running first java program in terminal
=====================================


My First Java program


public class HelloWorld {
   public static void main(String[] args) {
      System.out.println("Hello, World");
   }
}


file name  HelloWorld.java
saved in Desktop

Compiling the Program

iiitmk@iiitmk-HP-Compaq-6200-Pro-SFF-PC:~$ cd Desktop/
iiitmk@iiitmk-HP-Compaq-6200-Pro-SFF-PC:~/Desktop$ javac HelloWorld.java

Running the program

iiitmk@iiitmk-HP-Compaq-6200-Pro-SFF-PC:~$ cd Desktop/
iiitmk@iiitmk-HP-Compaq-6200-Pro-SFF-PC:~/Desktop$ java HelloWorld


Result - Hello, World


Installing Tomcat

Find a correct tomcat package to install

sudo apt-cache search tomcat


start/stop/restart Tomcat with following command

/etc/init.d/tomcat5.5 start
/etc/init.d/tomcat5.5 stop
/etc/init.d/tomcat5.5 restart


(iiitmk@iiitmk-HP-Compaq-6200-Pro-SFF-PC:/etc$ sudo init.d/tomcat6 restart)


Apache Tomcat

Apache Tomcat is a web container that allows you to serve Java Servlets and JSP (Java Server Pages) web applications.

The Tomcat 6.0 packages in Ubuntu support two different ways of running Tomcat. You can install them as a classic unique system-wide instance, that will be started at boot time will run as the tomcat6 unprivileged user. But you can also deploy private instances that will run with your own user rights, and that you should start and stop by yourself. This second way is particularly useful in a development server context where multiple users need to test on their own private Tomcat instances.

Installing Tomcat 6


To install the Tomcat server, you can enter the following command in the terminal prompt:

sudo apt-get install tomcat6


Acessing the tomcat through browser

http://localhost:8080/

webapps will be in var/lib/tomcat6/webapps


copying a web apps to tomcat (copying existing web app project)

iiitmk@iiitmk-HP-Compaq-6200-Pro-SFF-PC:~$ sudo cp -r Desktop/final /var/lib/tomcat6/webapps/


https://help.ubuntu.com/11.04/serverguide/C/tomcat.html


web apps structure

----test
------index.html
------index.jsp
------WEB-INF
---------web.xml
---------classes
-----------HelloWorld.java
-----------HelloWorld.class


Compling the servelet ( in command line)


javac -classpath /usr/share/tomcat6/lib/servlet-api.jar:classes. /var/lib/tomcat6/webapps/test/WEB-INF/classes/HelloWorld.java


Install Eclipse IDE on Ubuntu 11.10 (Oneiric Ocelot)


sudo apt-get install eclipse


you are a java developer then install JDT (Java Development Tools) using the command -

sudo apt-get install eclipse-jdt


C/C++ programming, install CDT plugin,

sudo apt-get install eclipse-cdt
============================================================
No comments:
Post a Comment